


Git Branching
Git branching is a powerful feature that allows you to create separate lines of development within a Git repository. Branches are useful for working on different features, bug fixes, or experiments without affecting the main codebase until the changes are ready.
Here are the basic Git commands related to branching:
Create a new branch: To create a new branch, use the following command:
git branch <branch_name>
Replace
<branch_name>with a descriptive name for your new branch.Switch to a branch: To switch to an existing branch, use the following command:
git checkout <branch_name>
Replace
<branch_name>with the name of the branch you want to switch to.Create and switch to a new branch: You can combine the branch creation and switching steps into a single command:
git checkout -b <branch_name>
This command creates a new branch and switches to it in one go.
List branches: To see a list of all branches in your repository, use the following command:
git branch
The current branch will be highlighted with an asterisk.
Merge branches: When you're ready to integrate changes from one branch into another, you can use the merge command. First, switch to the branch you want to merge changes into (usually the main branch), then run:
git merge <source_branch>
Replace <source_branch> with the name of the branch containing the changes you want to merge.
Delete a branch: To delete a branch that is no longer needed, use the following command:
git branch -d <branch_name>
Replace <branch_name> with the name of the branch you want to delete.
Note that you cannot delete the branch you are currently on. If you want to force-delete a branch, use -D instead of -d.
These are the fundamental commands for working with branches in Git. Branching allows for parallel development, isolating changes, and collaborative workflows. It's important to handle merges and conflicts carefully to ensure the smooth integration of changes from different branches.
Git Revert and Reset:
Git provides two different commands, git revert and git reset, which are used to undo changes in a repository. Let's understand their differences and usage:
Git Revert:
git revertundoes a commit by creating a new commit that reverses the changes made in the original commit. It is a safe way to undo commits, as it preserves the commit history and allows multiple people to work on the same branch without conflicts.Usage: To revert a specific commit, use the following command:
git revert <commit_id>
Replace
<commit_id>with the ID of the commit you want to revert. This command will create a new commit that undoes the changes made in the specified commit.Note that
git revertcan revert multiple commits at once by specifying a range of commit IDs.Git Reset:
git resetis used to move the current branch pointer to a specific commit, effectively resetting the branch to that commit. It allows you to remove commits from the branch history but should be used with caution because it modifies the commit history. If the changes have already been pushed to a remote repository, it's generally not recommended to usegit resetas it can cause issues for other collaborators.Usage: There are three different modes of
git reset---soft,--mixed, and--hard:--soft: Moves the branch pointer to the specified commit without modifying the staging area or working directory. Changes from the commits after the reset point will be uncommitted.--mixed(default): Moves the branch pointer and updates the staging area to match the specified commit, but does not modify the working directory. Changes from the commits after the reset point will be unstaged.--hard: Moves the branch pointer, updates the staging area, and resets the working directory to match the specified commit. Changes from the commits after the reset point will be discarded.To reset the branch to a specific commit, use the following command:
git reset -- <commit_id>
Replace
<mode>with the desired mode (soft,mixed, orhard) and<commit_id>with the ID of the commit you want to reset to.Caution: Be cautious when using
git reset --hardas it discards all changes in the working directory and staging area, irreversibly removing them.Remember,
git revertis generally considered a safer option as it preserves the commit history, whilegit resetis more powerful but can be risky and should be used with care.
Git Rebase and Merge
Git provides two different ways to integrate changes from one branch into another: git rebase and git merge. Let's understand their differences and usage:
Git Rebase:
git rebaseallows you to integrate the changes from one branch onto another by moving or applying the commits from the source branch onto the target branch. It essentially modifies the commit history by reapplying commits on top of a different branch. Rebasing can provide a linear, cleaner history but can also introduce conflicts that need to be resolved.Usage: To rebase a branch onto another branch, follow these steps:
Switch to the branch you want to rebase:
git checkout <source_branch>
Start the rebase onto the target branch:
git rebase <target_branch>
This command applies the commits from the source branch onto the target branch.
Resolve conflicts (if any): If conflicts occur during the rebase process, Git will pause and prompt you to resolve them manually. Use a text editor to resolve the conflicts in the affected files, save the changes, and then use the following command to continue the rebase:
git rebase --continue
Repeat the conflict resolution step (if needed) until the rebase is complete.
Note: Rebasing should be used primarily for feature branches or private branches that haven't been shared with others. It should not be used on public branches that are being collaborated on, as it can rewrite the committed history and cause confusion for others.
Git Merge:
git mergeintegrates changes from one branch into another by creating a new merge commit. It combines the commits from the source branch with the target branch, preserving the commit history of both branches. This is the recommended method for merging branches that are shared with others and maintain a clear history of changes.Usage: To merge a branch into another branch, follow these steps:
Switch to the target branch:
git checkout <target_branch>
Perform the merge:
git merge <source_branch>
This command combines the changes from the source branch into the target branch.
Resolve conflicts (if any): If conflicts occur during the merge process, Git will pause and prompt you to resolve them manually. Use a text editor to resolve the conflicts in the affected files, save the changes, and then use the following command to complete the merge:
git commit
Write a merge commit message and save it to complete the merge.
Note: Merging is generally the preferred method for integrating changes when collaborating with others, as it preserves the commit history and simplifies tracking changes.
In summary, git rebase is useful for integrating changes onto a clean, linear history but should be used with caution on shared branches. git merge is the recommended method for integrating changes and is suitable for both shared and private branches.
Task 1:
Add a text file called version01.txt inside the Devops/Git/ with “This is first feature of our application” written inside. This should be in a branch coming from
master, [hint trygit checkout -b dev], switch todevbranch ( Make sure your commit message will reflect as "Added new feature").version01.txt should reflect at local repo first followed by Remote repo for review. [Hint use your knowledge of Git push and git pull commands here]
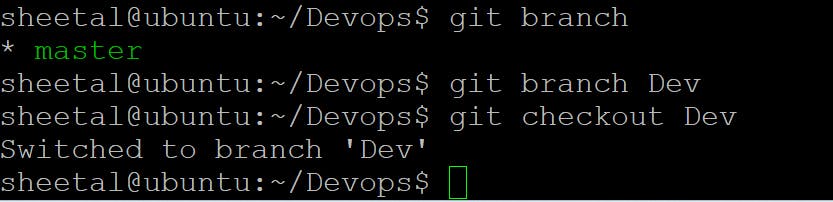
First, check the current branch and then create the branch using the git branch <branch_name> command.
Once you will create the branch, checkout to Dev branch.
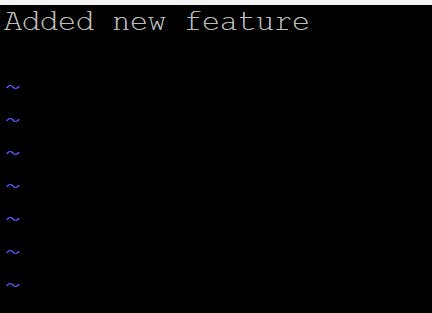
Create a file named Version01.txt using touch.

Write the text in a file version01.txt as "Added new feature"
Now we will push the changes to Github. To push the change to github we need to add a file to the staging area and then we need to commit the same.
To add and commit we will use the commands below:

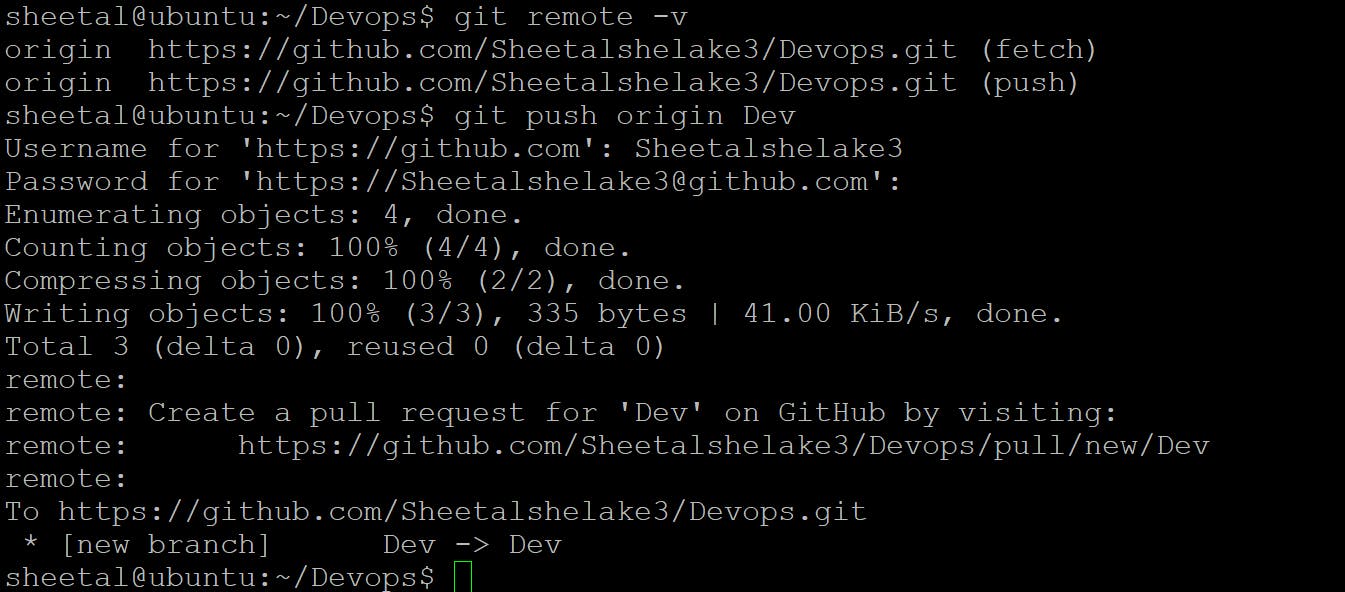
we will push the changes using commands below:
Add new commit in
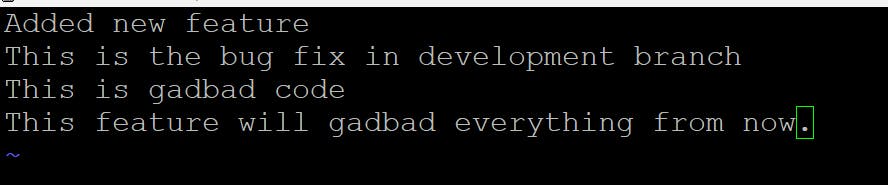
devbranch after adding below-mentioned content in Devops/Git/version01.txt: While writing the file make sure you write these lines1st line>> This is the bug fix in the development branch
Commit this with a message “ Added feature2 in development branch”
2nd line>> This is gadbad code
Commit this with a message “ Added feature3 in the development branch
3rd line>> This feature will gadbad everything from now.
Commit with a message “ Added feature4 in a development branch
Added 1st line "This is bug fix in the development branch"

Commit this with the message “ Added feature2 in development branch”

added second line "This is gadbad code" in version01.txt
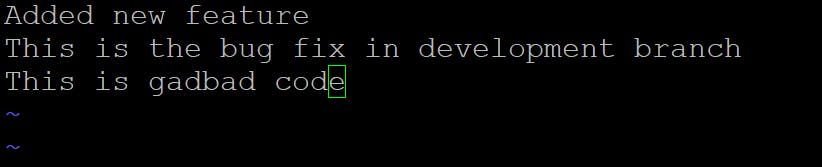
Commit with a message “ Added feature3 in development branch"

Adding 3rd line>> This feature will gadbad everything from now.
Commit with a message “ Added feature4 in a development branch

Restore the file to a previous version where the content should be “This is the bug fix in development branch”.

Task 2:
Demonstrate the concept of branches with 2 or more branches with screenshot.
add some changes to
devbranch and merge that branch inmasteras a practice try git rebase too, see what difference you get.
2 different branches created branch 1 and branch2. please find screen shot below

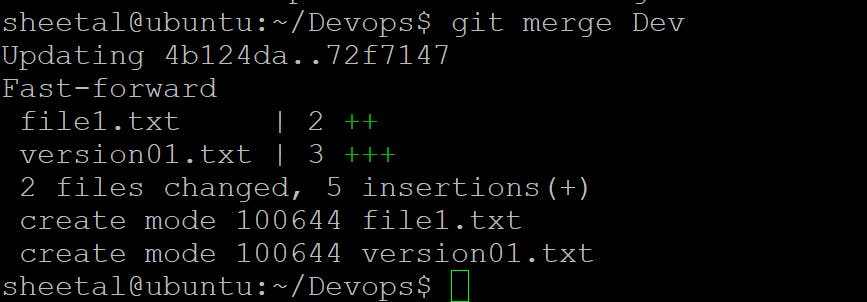
Add some changes to dev branch and merge that branch in master

Done with git commit for the file file1. please find screen shit below:

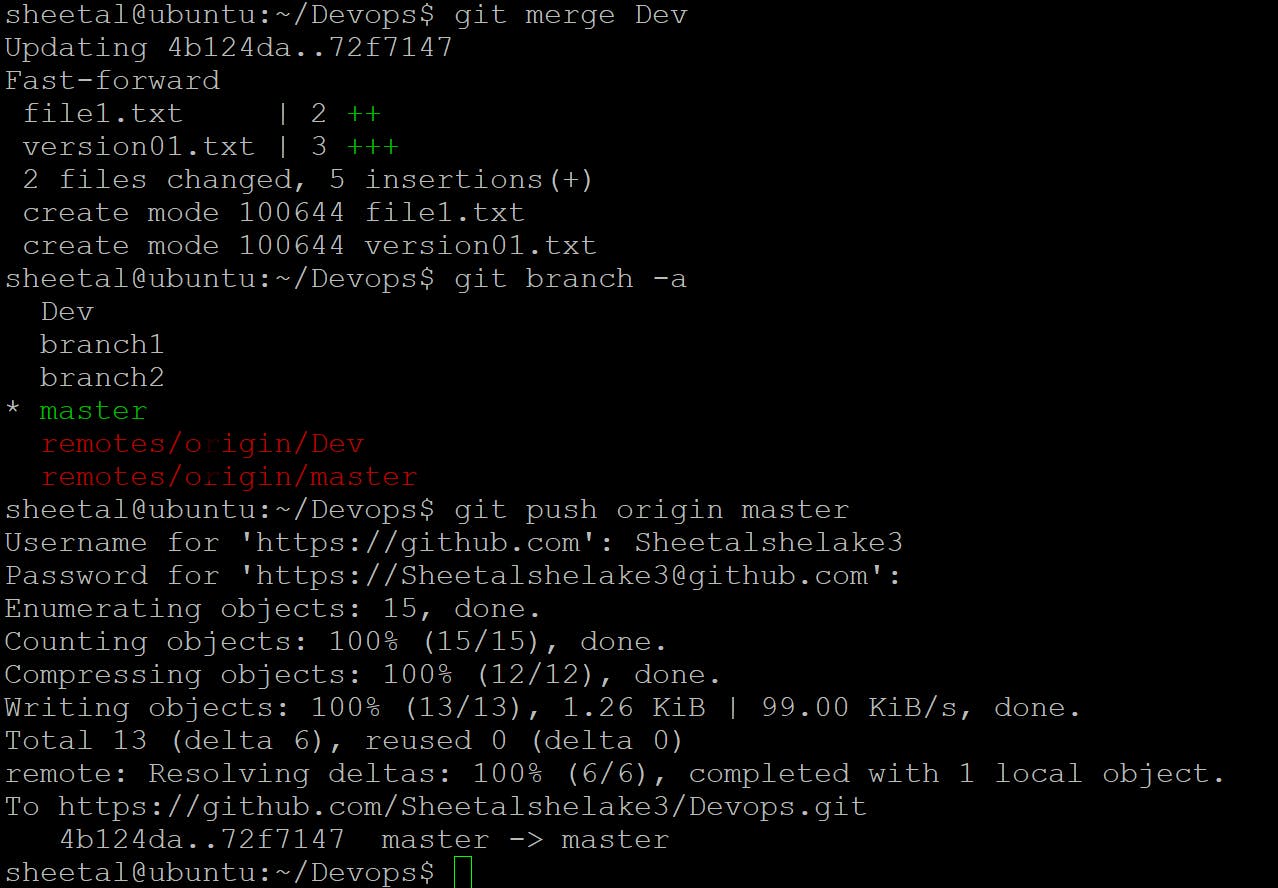
Merged Dev branch into master.
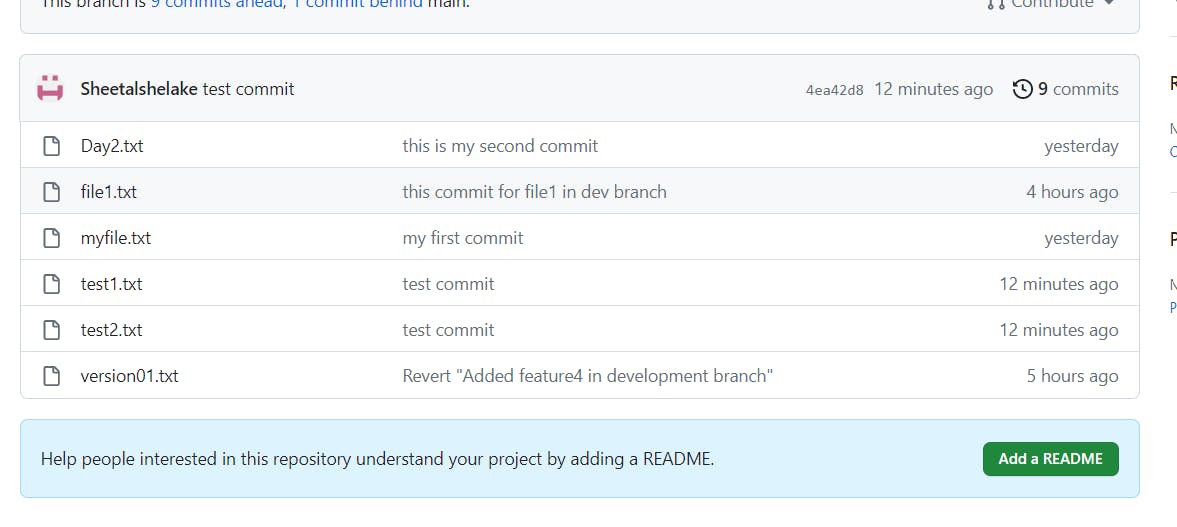
pushed the changes from local repo to Github.
Git Rebase:
The git rebase command is used to apply the commits of one branch on top of another branch. It allows you to integrate changes from one branch onto another branch with a linear commit history. Here's how it works:
Start by checking out the branch onto which you want to apply the commits. For example, if you want to rebase the feature/branch1 branch onto the master branch, run:
git checkout master
Run the git rebase command followed by the name of the branch you want to rebase onto the current branch. In this case, it would be:
git rebase feature/branch1
This command tells Git to take the commits from feature/branch1 and replay them on top of the master branch.
Git will start the rebase process, applying each commit from feature/branch1 on top of the master branch. If any conflicts arise during the rebase, Git will pause the process and allow you to resolve the conflicts manually.
To resolve conflicts, open the conflicting files, modify them to resolve the conflicts, and save the changes. Then, stage the resolved files by running:
git add ...
Replace, , etc. with the actual filenames of the resolved files.
After resolving conflicts and staging changes, continue the rebase process by running:
git rebase --continue
Git will apply the remaining commits and complete the rebase.
If there are multiple conflicts and you want to abort the rebase at any point, run:
git rebase --abort
This command will revert the branch to its original state before the rebase.
Once the rebase is complete, the commits from feature/branch1 will be applied on top of the master branch.
It's important to note that git rebase rewrites the commit history of the branch being rebased. If you have already pushed the branch to a remote repository, avoid rebasing it, as it can cause synchronization issues with other collaborators. Instead, consider using git merge to integrate the changes.
Use git rebase when you want to maintain a clean, linear commit history and integrate the changes from one branch onto another
Example:
Here I have rebase the Dev branch into master branch pushed the changed to github.

Checked on github and found that Dev branch rebase into master branch.
Here is the end of this blog we will meet in the next blog.